How to Change Your Own Oil (Step by Step)
To change your own oil, warm the engine for a couple of minutes, raise the car safely on ramps or jack stands, drain the old oil from the drain plug, replace the oil filter, reinstall the plug with a new washer, and refill with the type and amount of oil listed in your owner’s manual. Then run the engine, check for leaks, top up to the full mark and recycle the used oil. Most first-timers finish in about an hour and spend roughly $25 to $60 on oil and a filter.
What You Need
| Item | Why |
|---|---|
| Correct motor oil (type, viscosity and amount from the manual) | Protects your engine and warranty |
| New oil filter for your engine | Old filter holds contaminants |
| New drain plug washer or gasket | Prevents drips from the plug |
| Wrench or socket for the drain plug | To remove and reinstall it |
| Oil filter wrench | Filters can be tight |
| Drain pan (6+ quart capacity) | Catches the old oil |
| Funnel | Clean refilling |
| Ramps or a jack and jack stands | Safe access underneath |
| Wheel chocks, gloves, rags and eye protection | Safety and cleanup |
| Torque wrench (recommended) | Correct plug tightness |
How to Choose the Right Oil and Filter
- Oil grade: use the viscosity in your owner’s manual or on the oil filler cap, such as 0W-20 or 5W-30.
- Oil approval: look for the API SP or SQ donut and ILSAC starburst, plus any automaker approval your car requires (for example dexos1 for many GM vehicles or specific approvals for European cars).
- Oil quantity: check the capacity “with filter” in the manual. Most cars take about 4 to 6 quarts; buy a 5-quart jug plus a single quart if needed.
- Filter: buy a filter listed for your exact engine. Spin-on filters thread onto the engine; cartridge filters sit inside a housing and come with new O-rings.
- Drain plug washer: many cars use a single-use crush washer. Replace it with every change.
- Filter quality: an OEM or reputable brand filter is worth the few extra dollars, especially for longer synthetic intervals.
How to Change Your Oil Step by Step
- Check the manual: confirm oil type, viscosity (for example 0W-20), capacity and drain plug torque.
- Warm the engine briefly: run it for 2 to 3 minutes so the oil flows well, then turn it off. Do not work on a fully hot engine.
- Raise the car safely: drive onto ramps or lift it with a jack and support it on jack stands at the specified points. Chock the rear wheels and set the parking brake.
- Open the oil filler cap: this lets the oil drain faster.
- Position the drain pan: under the drain plug, slightly toward the direction the oil will flow out.
- Remove the drain plug: loosen it with a wrench, then unscrew it by hand, pulling it away quickly as the oil starts to flow.
- Let it drain completely: usually 5 to 10 minutes.
- Reinstall the drain plug: with a new washer, and tighten it to the specified torque. Do not overtighten.
- Remove the old filter: place the pan under it, unscrew it with a filter wrench, and make sure the old rubber gasket came off with it.
- Install the new filter: smear a little fresh oil on its gasket, screw it on by hand until the gasket touches, then tighten it about three-quarters of a turn more, or as directed on the filter.
- Lower the car and add oil: pour in slightly less than the full capacity through a funnel.
- Run the engine for 30 seconds: then turn it off and look underneath for leaks at the plug and filter.
- Check the level: wait a few minutes, check the dipstick and top up to the full mark.
- Reset the oil-life reminder: using the procedure in your manual.
- Recycle the old oil and filter: pour the oil into a sealed container and take it to a recycling point.
Safety first: never get under a car supported only by a jack. Use ramps or rated jack stands on firm, level ground, chock the wheels, and let a hot engine cool before draining. Hot oil can cause serious burns, and used oil should not touch your skin for long periods.
Cartridge Filters
Some engines, including many European and some newer Japanese and American engines, use a cartridge filter in a housing on top of or beside the engine instead of a spin-on canister. You unscrew the housing cap, replace the paper element and its O-rings, and tighten the cap to the specified torque. The new O-rings usually come with the filter.
How to Check the Oil Level Afterward
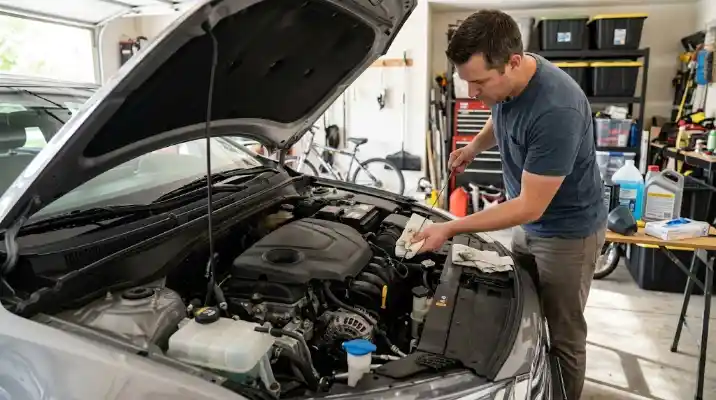
Pull the dipstick, wipe it, reinsert it fully and pull it out again. The oil should sit between the two marks, close to the full mark. Check again the next morning and after your first drive. Our step-by-step guide to checking your car’s oil covers what the color and consistency mean.
Reset the Oil Life Monitor
Most cars built in the last 15 years have an oil life or maintenance reminder that must be reset after an oil change. The method varies: some use a menu in the instrument cluster or infotainment screen, some use a button sequence on the dash, and a few use a pedal-and-ignition sequence. Your owner’s manual lists the exact steps. If you skip the reset, the car will keep warning you and will not track the next interval correctly.
Safety Tips for Working Under a Car
- Park on flat, solid ground and set the parking brake.
- Use ramps or rated jack stands at the manufacturer’s lift points; never rely on a jack alone.
- Chock the wheels that stay on the ground.
- Let a hot engine cool for 10 to 20 minutes so the oil is warm, not scalding.
- Wear gloves and safety glasses; used oil contains contaminants.
- Keep a spill kit or kitty litter handy for drips.
Common DIY Oil Change Mistakes
- Wrong oil or viscosity: always follow the manual.
- Overfilling or underfilling: add oil gradually and check the dipstick.
- Double gasket: leaving the old filter gasket stuck to the engine causes a big leak.
- Overtightening the plug: can strip the oil pan threads, an expensive repair.
- Reusing the old washer: a common cause of slow drips; our guide to car oil leaks covers other causes.
- Forgetting the filler cap: always recheck it before driving.
- Skipping the reset: the oil-life reminder will be wrong.
How to Dispose of Used Oil
Used motor oil is hazardous waste and must never go down a drain or into the trash. Pour it into the empty oil bottles or a sealed container and take it, along with the drained filter, to an auto parts store, service station or municipal recycling center. Many parts stores accept it free of charge.
Is Changing Your Own Oil Worth It?
| DIY | Shop | |
|---|---|---|
| Cost per change | About $25–$60 in parts | About $35–$125 |
| Time | About 30–60 minutes plus cleanup | A trip plus waiting time |
| Tools needed | Yes, one-time purchase | No |
| Inspection by a technician | No | Often included |
| Control over oil and filter quality | Full | Depends on the shop |
DIY saves money over time and lets you inspect your car more closely, but it only makes sense if you can lift the car safely and recycle the oil. Keep your receipts and a log of date and mileage for warranty purposes. Our car maintenance schedule by mileage shows what else you can check while you are under there, and changing the engine air filter is another easy job, as shown in our air filter guide.
Related guides: how to check car fluids, do electric cars need oil changes and dashboard symbols and meanings.
DIY Oil Change FAQ
About 30 to 60 minutes for most people, and a bit longer the first time.
It is strongly recommended. A new crush washer helps the plug seal and prevents slow drips.
No. Under the federal Magnuson-Moss Warranty Act, doing your own maintenance does not void your warranty, as long as you use the correct parts and keep records.
Often about $30 to $70 per change compared with a shop, since DIY parts typically cost about $35 to $70 for synthetic oil and a filter. The first change costs more if you need to buy tools.
Some vehicles, especially trucks and SUVs with high ground clearance, can be done without lifting. Many cars need ramps or jack stands for safe access to the drain plug and filter.